

Last Updated: October 22, 2026
Quick Summary
Concrete coatings fail outdoors mainly because of moisture trapped under the slab, poor surface preparation, or a coating that can’t handle the local weather. Once the bond with the slab breaks, water gets in and the damage speeds up, showing up as peeling, blistering, or cracking.
- Test for moisture with a plastic sheet test, calcium chloride test, or moisture meter before coating.
- A properly prepped surface feels like medium sandpaper and holds water without beading.
- Standard epoxies chalk and yellow in direct sun, so use aliphatic polyurethane or polyaspartic topcoats.
- Patch only when damage covers less than roughly a quarter of the surface and the cause is correctable.
- Rinse debris seasonally, keep drainage clear, re-seal joints, and touch up chips before water gets behind the film.
Table of Contents
- Why Concrete Coatings Fail Outdoors: The Short Answer
- Moisture Problems Under Concrete Coatings
- Outdoor Concrete Coating Surface Preparation Mistakes
- Concrete Coating Peeling and Flaking: What It Signals
- Cracks, Joints, and Substrate Defects That Sink Coatings
- Weather, Temperature, and UV Exposure
- The Best Coating for Outdoor Concrete by Climate
- Repair or Remove: Diagnosing a Failed Coating Step by Step
- Frequently Asked Questions
Why Concrete Coatings Fail Outdoors: The Short Answer
Most outdoor concrete coatings fail for one of three reasons: moisture trapped under the slab, poor surface preparation, or a coating that can’t handle the local weather. At CTi of Acadiana, LLC, we see these same problems on patios and driveways across the region, and they almost always trace back to a step that got skipped.
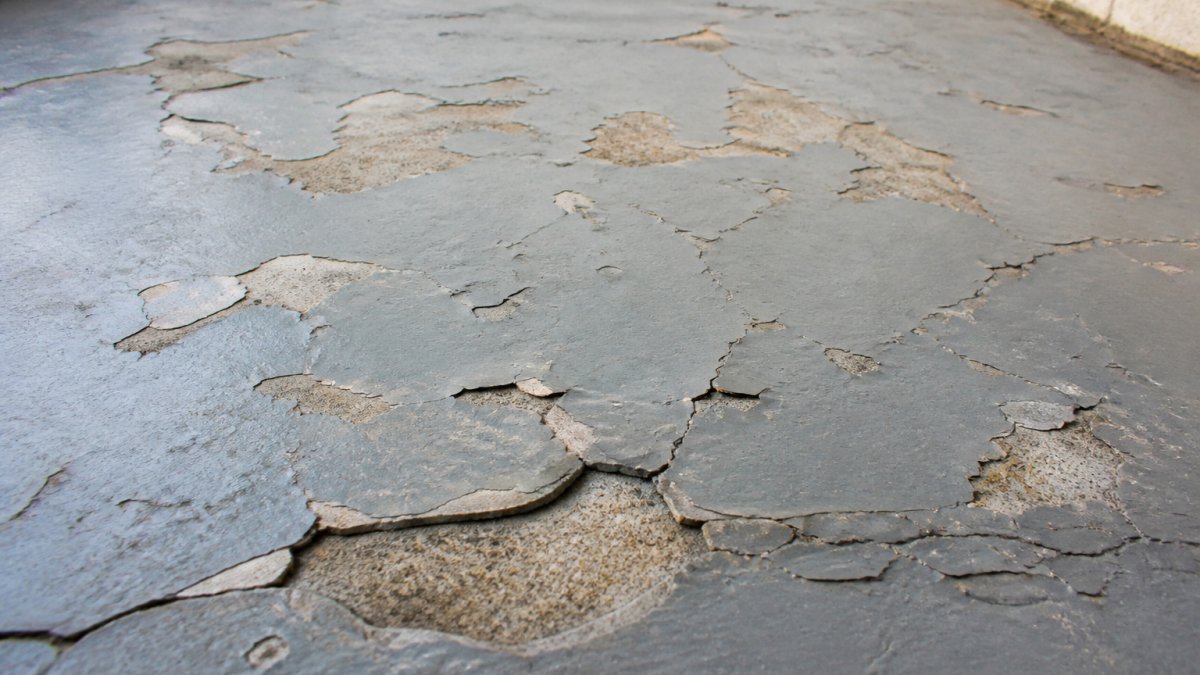
Concrete coating failure is the breakdown of a protective layer’s bond with the slab, which shows up as peeling, blistering, or cracking. Once that bond goes, water gets in and the damage speeds up.
The fix starts with knowing why it happened. Below, we break down the seven causes we run into most and how to handle each one.
Moisture Problems Under Concrete Coatings
Water is the number one enemy of any outdoor coating. Concrete breathes, and moisture moves through it constantly. When a coating seals the top before that moisture escapes, pressure builds underneath.
The result? Bubbles, blisters, and eventual peeling. A common mistake is coating a slab that looks dry on the surface but is still wet inside. New concrete needs time to cure, and older slabs can hold moisture from a high water table or poor drainage.
Coating over damp concrete traps moisture and guarantees blistering within months. Test first, coat second. Skipping this step is the most expensive shortcut in the business.
How to Test for Moisture Before Coating
A simple plastic sheet test gives you a quick read. Tape a clear plastic square to the slab, wait 24 hours, and check for condensation underneath. Any trapped moisture means the slab isn’t ready.
For a more reliable check, use a calcium chloride test or a moisture meter. Many coating makers publish acceptable moisture limits, and the ASTM standard for measuring moisture in concrete gives you a recognized method to follow.
Outdoor Concrete Coating Surface Preparation Mistakes
Surface preparation decides whether a coating bonds or fails. A coating needs a rough, clean, open surface to grip. Skip the prep, and even a premium product will peel.
Here’s what goes wrong most often:
- Coating over dirt, oil, or old sealant
- Skipping the acid etch or grind
- Leaving dust behind after cleaning
- Coating a surface that’s too smooth
The right surface profile gives the coating something to lock into. Grinding or shot blasting opens the pores and removes contaminants in one pass.
Run your hand over the slab after prep. If it feels slick or dusty, keep going. A properly prepped surface feels like medium sandpaper and holds water without beading.
Concrete Coating Peeling and Flaking: What It Signals
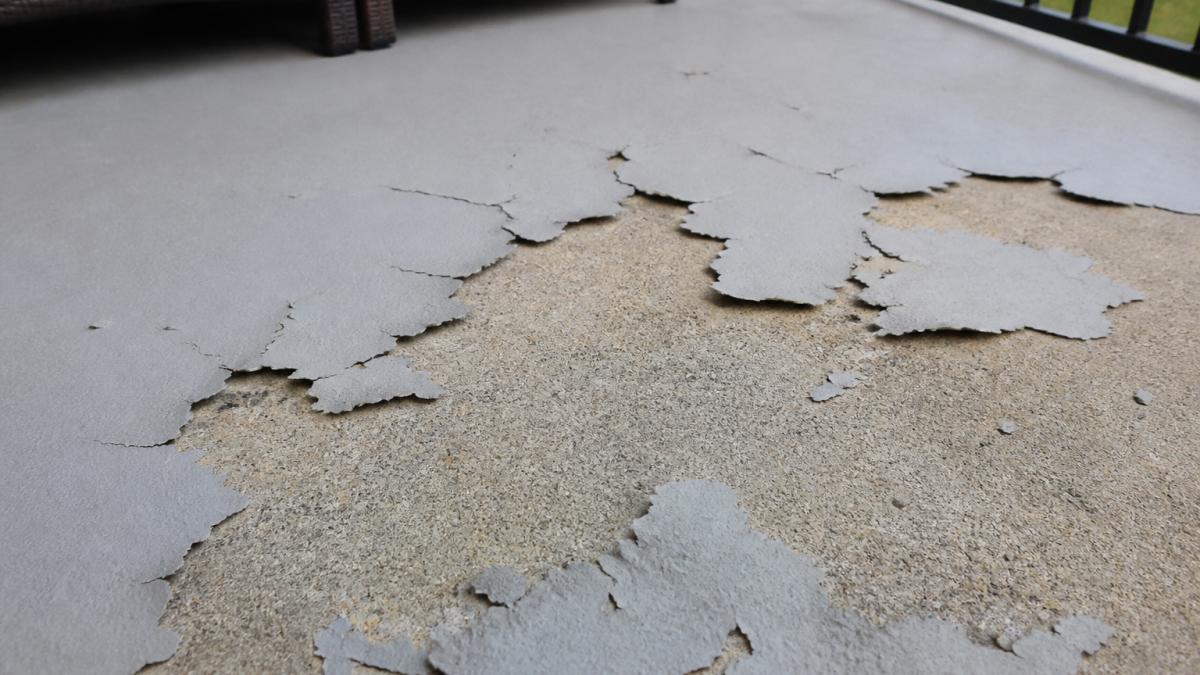
Peeling and flaking point to an adhesion failure. The coating never fully bonded, or something pushed it off from below.
Blisters that pop and leave bare concrete usually mean moisture. Flakes that curl at the edges often mean poor prep. Either way, patching over the top won’t last.
Coating adhesion depends on three things: a clean substrate, the right surface profile, and a coating suited to the job. Miss any one and the bond fails. That’s why diagnosis matters more than the product label.
Cracks, Joints, and Substrate Defects That Sink Coatings
Concrete moves. It expands in heat, shrinks as it cures, and cracks along the way. Coatings don’t stretch with it, so cracks and joints become failure points.
Watch for these substrate issues:
- Drying shrinkage cracks that open as the slab cures
- Thermal cracks from seasonal temperature swings
- Control joints that need proper filling before coating
- Spalling and surface defects that leave weak spots
A rigid coating over a moving crack will crack too. Flexible crack fillers and joint sealants let the slab move without tearing the coating. Fix the cracks and defects before the topcoat goes down, or they’ll telegraph right through.
Weather, Temperature, and UV Exposure
Outdoor coatings take a beating from sun, rain, and temperature swings. UV rays break down resins over time, and freeze-thaw cycles stress the bond. Rain and snow exposure add moisture load on top.
Temperature at application matters just as much. Most coatings need a specific window to cure properly. Apply in the wrong conditions and the coating never reaches full strength.
The best coating for outdoor concrete depends on your climate. A product that performs in a dry, mild region can fail fast under heavy rain, humidity, or hard freezes.
The Best Coating for Outdoor Concrete by Climate
Outdoor coatings are not interchangeable. A product that performs on a shaded patio in a mild climate can fail within a season on a sun-blasted driveway in a freeze-thaw zone. The right choice depends on the specific exposures the slab will face, not on a generic “outdoor” label.
Here is how the main coating families stack up against the exposures that matter most.
| Coating Type | UV Resistance | Freeze-Thaw Flexibility | Moisture Tolerance | Traffic Suitability | Typical Outdoor Use |
|---|---|---|---|---|---|
| Epoxy | Low, chalks and yellows in direct sun | Low, rigid, cracks with movement | Moderate, bonds poorly to damp slabs | High compressive strength | Covered patios, garages, shaded walkways |
| Polyurethane | High, retains color and gloss | High, elastomeric grades bridge minor movement | Moderate to high | Good abrasion resistance | Sun-exposed driveways, pool decks, commercial walkways |
| Acrylic | Moderate, fades over time | Moderate | Low to moderate | Low, wears under vehicle traffic | Budget patios, low-traffic residential slabs |
| Polyaspartic | High, aliphatic chemistry resists yellowing | Moderate to high | Moderate, sensitive to substrate moisture at application | High | Fast-turnaround projects, varied weather windows |
Match the system to the dominant exposure:
- High UV exposure (south- and west-facing slabs, long sun hours): Aliphatic polyurethane or polyaspartic topcoats resist chalking and color shift. Standard epoxies are a poor choice for any slab that sees direct sun, because aromatic epoxy breaks down under UV and turns chalky within a season or two.
- Freeze-thaw cycles: Flexibility is the deciding factor. Rigid coatings crack when the slab moves; elastomeric polyurethane or a flexible polyaspartic system can accommodate that movement. Proper joint sealing matters as much as the coating itself.
- Heavy rainfall and humidity: Choose coatings with strong moisture tolerance and pair them with drainage that moves water away from the slab edge. A coating cannot compensate for a slab that sits in standing water.
- Vehicle traffic: Abrasion resistance and compressive strength matter more than UV resistance on driveways. Epoxy performs well under tires but needs a UV-stable topcoat if the slab is sun-exposed.
There is no single best outdoor coating. The best system is the one matched to your slab’s UV load, freeze-thaw exposure, moisture conditions, and traffic, and installed over a properly prepped, dry substrate.
A common pattern is to see a homeowner choose a high-performance coating and then watch it fail because the product was right but the exposure match was wrong. Selecting by climate and exposure first, then by brand and price, prevents that outcome.
Repair or Remove: Diagnosing a Failed Coating Step by Step
Not every failure means a full removal, but patching a coating that is failing from the substrate up is a waste of money.
Use this diagnosis sequence:
- Map the damage. Note where it is peeling, blistering, or cracking, and estimate what percentage of the surface is affected.
- Check for moisture. Test the slab in the worst spots using the plastic sheet test or a calcium chloride test. Moisture-driven failure will return unless the source is corrected.
- Inspect the edges. Curled or lifted edges signal poor prep or contamination. If edges are lifting across the whole slab, the bond was never sound.
- Look at cracks and joints. Note movement, width, and whether cracks telegraph through the coating. Active cracks need flexible filler, not a rigid patch.
- Test adhesion. Press or pry a small area to see whether the bond holds. Coating that releases easily indicates widespread bond failure.
- Decide: repair or remove. Use the criteria below.
Repair criteria, patch when all of these are true:
- Damage is isolated to less than roughly a quarter of the surface.
- The root cause is identified and correctable (a single contaminated spot, a repaired crack, a localized moisture source).
- Surrounding coating still bonds firmly to the slab.
- The failure is surface-level (wear, scuffing, minor UV chalking) rather than bond failure.
Partial removal criteria, strip and recoat sections when:
- Failure is concentrated in one zone, such as a low spot that holds water or an area with poor original prep.
- The rest of the coating tests sound, but the failed zone cannot be blended invisibly.
- The substrate under the failed zone needs remediation (spalling repair, crack filling, moisture mitigation).
Full removal criteria, strip to bare concrete when:
- Peeling, blistering, or cracking covers most of the surface.
- Moisture testing shows elevated readings across the slab.
- The original coating was applied over a contaminated or improperly prepped surface.
- Multiple repair attempts have failed in the same areas.
If the coating is failing across most of the surface, removal is the honest call. A study in Construction and Building Materials on coating failure at a wastewater plant shows how persistent moisture and a stressed substrate drive coating breakdown, which is why fixing the cause beats covering it up.
Expected Service Life and Maintenance
Even a correctly installed outdoor coating has a finite life. Realistic expectations help prevent repeat failures:
- Epoxy: Typically the shortest outdoor life when UV-exposed; a UV-stable topcoat extends it. Expect more frequent inspection on sun-facing slabs.
- Polyurethane and polyaspartic: Generally longer outdoor service life, but performance depends on film thickness, prep, and exposure.
- Acrylic: Shorter service life, especially under traffic or intense sun; plan for more frequent recoating.
A simple maintenance routine extends any coating: rinse or blow off debris seasonally, keep drainage paths clear, re-seal joints as sealant ages, and touch up small chips before water gets behind the film. Inspect after the first freeze-thaw season and again after the hottest months, since those are when bond failures first show.
Photograph the slab right after installation and again each season. Comparing photos makes it easy to spot early blistering or edge lifting before it spreads.
Frequently Asked Questions
What causes concrete coatings to fail outdoors?
The most common causes are moisture trapped under the slab, poor surface preparation, and cracks that let water in. Temperature swings and UV exposure speed up the breakdown. A coating applied over a damp or dirty surface cannot bond properly, so it lifts within a season or two. Fixing the underlying moisture and prep issues matters more than switching brands.
Why is my concrete coating peeling and flaking?
Peeling and flaking usually mean the coating lost its bond with the concrete. That happens when the surface was not cleaned or profiled correctly, when moisture is pushing up from below, or when the coating was applied outside its recommended temperature range. Once flaking starts, spot repairs rarely hold. The failed area usually needs to be removed back to sound concrete before recoating.
Can moisture cause an outdoor concrete coating to blister?
Yes. Moisture vapor moving up through the slab gets trapped under the coating and pushes it into blisters. This is common on slabs with no vapor barrier and in shaded areas that stay damp. Before recoating, test for moisture and fix drainage or grading issues. A coating that resists vapor transmission will hold up better than a standard epoxy in these conditions.
Can you coat cracked or damaged concrete?
You can, but the cracks need treatment first. Hairline cracks can often be filled and bridged with a flexible patching material. Wider cracks and moving joints need a flexible sealant so the coating does not tear when the slab shifts. Coating straight over untreated cracks lets water in and the failure repeats. A professional inspection tells you whether repair or removal is the right call.
No responses yet