

Last Updated: October 26, 2026
Quick Summary
To clean porous concrete, sweep away loose debris first, apply a pH-neutral cleaner diluted to half strength, let it dwell 5-10 minutes, scrub with a stiff brush, then vacuum and rinse with low-pressure water. This method prevents cleaners and contaminants from being driven deeper into the pores, which is the main risk when cleaning porous concrete.
- Test any cleaner on a small patch first and check for discoloration, residue, or sealer damage before treating the entire slab.
- Use a wet/dry vacuum between scrubbing and rinsing to remove dirty solution before it soaks deeper into the pores.
- Avoid pressure washers as a cleaning tool; if used at all, keep pressure under 1,500 PSI and use only as a low-pressure rinse.
- Wait at least 24-48 hours after cleaning before sealing or coating to ensure the pores are completely dry.
Table of Contents
- Why Porous Concrete Requires a Different Cleaning Approach
- Step 1: Prepare Your Concrete Slab by Removing Loose Debris
- Step 2: Choose the Best Cleaner for Concrete Slabs
- Step 3: Test Your Cleaner and Scrub Rough Concrete Floors
- How to Remove Stains from Concrete Without Driving Them Deeper
- How to Pressure Wash Concrete Safely Without Damaging Porous Surfaces
- Step 4: Rinse, Dry, and Manage Moisture to Prevent Damage
- Schedule Your Professional Concrete Finishing Consultation
- Frequently Asked Questions
Why Porous Concrete Requires a Different Cleaning Approach
Porous concrete slabs absorb water, dirt, and stains like a sponge. This makes them harder to clean than smooth concrete surfaces.
Regular mopping leaves grime trapped inside the pores. Pressure washing can force contaminants deeper into the surface, making stains worse.
The good news: cleaning porous concrete is straightforward once you understand what’s happening. The concrete’s texture holds dirt, biofilm, and buildup beyond what a mop can reach.
Step 1: Prepare Your Concrete Slab by Removing Loose Debris
Start by clearing away everything on the surface. Sweep or vacuum the concrete slab thoroughly.
Why this matters: loose debris mixed with water creates a slurry that can stain porous concrete. Removing it first prevents that problem.
Use a stiff broom or shop vacuum for this step:
- A stiff-bristle broom works well for outdoor concrete driveways and patios
- A shop vacuum is faster for large areas and indoor concrete floors
- Vacuum edges and corners where dust collects
Don’t skip this step. It’s the foundation for everything that follows. Most people try to clean porous concrete without removing loose debris first, and the results disappoint them.
Step 2: Choose the Best Cleaner for Concrete Slabs
On a porous slab, the cleaner you pick matters less than how much of it the concrete absorbs. These same techniques apply when cleaning garage floors. Smooth concrete lets a solution sit on top; porous concrete pulls it into the pore structure within seconds. That changes dilution, dwell time, and how completely you must rinse. Most generic concrete-cleaning guides skip this, so use the steps below to match the cleaner to the slab rather than guessing.
First, confirm the slab is actually porous
Before choosing a cleaner, run a simple water-absorption check on an inconspicuous area:
- Pour about 1/4 cup of water onto the surface.
- Watch how fast it disappears. Water that soaks in within 30-60 seconds signals an open, absorbent surface. Water that beads or sits for several minutes suggests a denser surface or an existing sealer.
- Repeat in two or three spots, because porosity varies across a single slab, especially near edges, control joints, and broom-finished zones.
If the water beads, assume a sealer or coating is present and treat cleaning as a sealer-compatibility question, not just a dirt question. If it soaks in fast, plan for shorter dwell times and more thorough rinsing than a general-purpose label suggests.
Match the cleaner to the porosity
For an absorbent slab, a pH-neutral or mild alkaline detergent is the default. Mix it at the weaker end of the label dilution, not the stronger end. A common pattern among contractors is to start around half the recommended strength on a test patch and increase only if the dirt does not lift.
Avoid these on porous slabs:
- Bleach at full strength (can discolor and leaves residue in the pores)
- Vinegar and other acids (can etch the surface and react with sealers)
- Ammonia-based cleaners (can damage sealers and coatings)
A pH-neutral cleaner is the safest baseline for rough, broom-finished, and stamped surfaces. Warm water helps the detergent dissolve dirt faster than cold water, but keep the solution mild.
Test the cleaner before treating the whole slab
A patch test is not optional on porous concrete. Apply the diluted cleaner to a corner or hidden area, let it dwell 3-5 minutes, scrub with a stiff nylon brush, and rinse. Then check three things:
- Color: any lightening, darkening, or blotching means the cleaner is too aggressive or the dwell time is too long.
- Residue: a chalky or soapy film after rinsing means the cleaner is binding in the pores and you need a weaker mix or more rinsing.
- Sealer response: if the surface was sealed, watch for dulling, tackiness, or water beading that changes after cleaning. That signals the cleaner is attacking the sealer.
Cleaner compatibility with sealers and future finishes
This is the gap most cleaning guides miss. Residue left in porous concrete can interfere with staining, sealing, or coating later. If you plan to seal or coat the slab, choose a cleaner the sealer manufacturer lists as compatible, rinse until the water runs clear, and let the slab dry fully before applying anything. A cleaner that leaves a surfactant film can cause a new sealer to fish-eye, peel, or bond unevenly.
Test the cleaner on a small patch and check for residue after it dries, not just while it is wet. Residue that is invisible when wet often shows as a white haze once the slab dries.
Step 3: Test Your Cleaner and Scrub Rough Concrete Floors
Before treating the entire slab, test your cleaner on a small section.
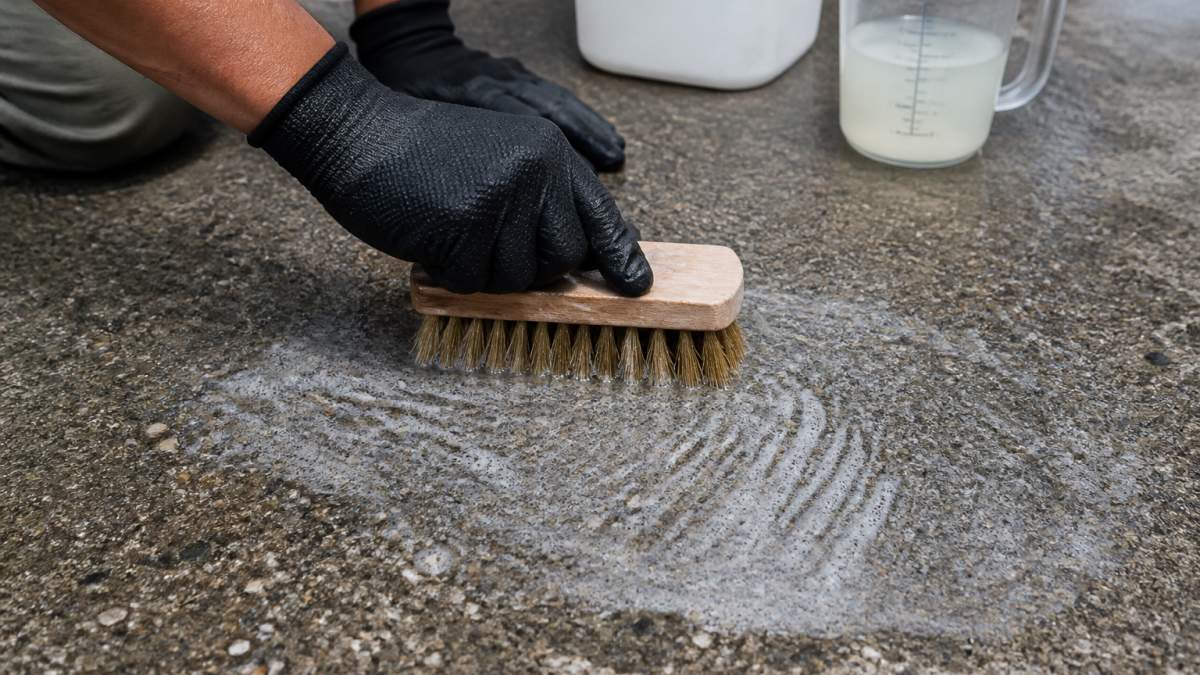
If the test area looks good, proceed to the full concrete slab.
Now scrub. Use a stiff-bristle brush or a rotary floor scrubber for larger areas.
The scrubbing action is what pulls contaminants out of the pores.
Follow these steps to safely clean your porous concrete slab after choosing the right cleaner.
| Step | Action | Dwell Time |
|---|---|---|
| Test patch | Apply cleaner to corner, scrub, rinse, check for discoloration | 3-5 minutes |
| Apply cleaner | Spread solution over manageable section | 5-10 minutes |
| Scrub | Work with stiff brush or rotary scrubber in circular motions | As needed |
| Vacuum | Remove dirty solution with wet/dry vacuum | Immediately after |
| Rinse | Use garden hose at low flow, then vacuum again | Until water runs clear |
How to Remove Stains from Concrete Without Driving Them Deeper
Stains on porous concrete require specific treatment. The challenge: aggressive cleaning can push stains deeper into the pores instead of removing them.
For oil and grease stains:
- Apply a degreaser designed for concrete
- Let it sit for 15-20 minutes
- Scrub gently with a stiff brush
For moss, mildew, and mold:
- Use a mild bleach solution (1 part bleach to 10 parts water) or a concrete mold cleaner
- Apply and let sit for 10 minutes
- Scrub with a brush
According to research published in Sustainability (MDPI) in 2022, high-pressure water injection combined with vacuuming proved most effective for cleaning porous surfaces.
The key principle: remove stains by lifting them out, not by forcing them deeper. A patient approach with scrubbing beats aggressive pressure every time on porous concrete.
How to Pressure Wash Concrete Safely Without Damaging Porous Surfaces
Pressure washing is the step most likely to make a porous slab worse. Learn why concrete coatings fail outdoors and how to avoid similar damage. The risk is not just surface damage. High-pressure water drives water, cleaner, and loosened contaminants deeper into the pore structure, and on an absorbent slab that can turn a surface stain into a subsurface one.
The no-pressure-washer method for porous slabs
This approach works for driveways, patios, garage floors, and indoor slabs, and it gives you control over how much water enters the pores.
- Sweep or vacuum loose debris first.
- Apply your diluted pH-neutral cleaner to a manageable section, roughly 10 ft by 10 ft, so it does not dry before you scrub.
- Let it dwell 5-10 minutes, but do not let it dry. Mist lightly if the slab starts to dry.
- Scrub with a stiff nylon brush or a rotary floor scrubber, working in overlapping passes.
- Remove the dirty solution with a wet/dry vacuum instead of rinsing it across the slab. Vacuuming lifts the contaminated water out before it soaks in.
- Rinse with clean water from a garden hose at low flow, then vacuum again.
Wet-vacuuming between steps is the key difference from generic advice. It removes cleaner and suspended dirt before they can wick deeper, which is exactly the failure mode pressure washing creates.
If you use a pressure washer
Treat it as a rinse tool, not a cleaning tool:
- Keep pressure under about 1,500 PSI, and lower is better on absorbent slabs.
- Hold the nozzle at least 12 inches from the surface and keep it moving.
- Use a wide fan tip, not a pinpoint stream.
Never use pressure to push a cleaner into the slab. Apply cleaner by low-pressure spray or brush, let it dwell, scrub, and rinse at low pressure.
Control runoff and residue
On outdoor slabs, direct rinse water away from storm drains where local rules require it, and avoid letting cleaner run onto lawns or planting beds. On indoor slabs, use a wet/dry vacuum and towels to control water rather than letting it spread. Rinse until the water runs clear, then vacuum the surface once more to remove residual moisture.
Check moisture before sealing or coating
Do not seal or coat a porous slab until it is dry through the pore structure, not just dry to the touch. A simple check is to tape a 2 ft by 2 ft square of plastic sheeting to the slab, seal the edges, and leave it for 24 hours. Condensation on the underside means moisture is still moving through the slab and it needs more drying time.
Pressure washing a sealed porous slab can force water under the sealer and cause blistering or peeling. If the slab is sealed, clean at low pressure and confirm the cleaner is compatible with the sealer before you start.
Step 4: Rinse, Dry, and Manage Moisture to Prevent Damage
After scrubbing, rinse the concrete slab thoroughly with clean water. Use a garden hose or low-pressure water source.
Here’s the critical part: drying and moisture management. Porous concrete absorbs water. If you leave it wet, water stays trapped inside the pores. This can lead to:
- Mold and mildew growth
- Efflorescence (white, powdery residue)
- Weakening of the surface
Dry the concrete slab as quickly as possible:
- Use a shop vacuum to remove standing water
- Open windows or use fans to increase air circulation
- Let natural sunlight help dry the surface
Don’t seal the concrete immediately after cleaning. Wait at least 24-48 hours to ensure the pores are completely dry.
According to research from the New Jersey Department of Transportation, porous pavements should be washed with clean, low-pressure water followed by immediate vacuuming.
For concrete garage floors or indoor slabs, ventilation is essential. Open doors and windows. Let air flow across the surface.
Schedule Your Professional Concrete Finishing Consultation
Cleaning porous concrete is manageable for most homeowners. But if your concrete is heavily stained, damaged, or you’re concerned about the process, professional help makes sense.
We provide a free custom estimate with on-site inspection and detailed measurements.
If you want to transform worn surfaces into beautiful, durable, slip-safe spaces, our Hallmark System is easy to care for and slip safe.
Concrete Masonry & Hardscapes Association cleaning guidance
NJDOT research on porous concrete maintenance
Sustainability journal study on cleaning porous surfaces
Frequently Asked Questions
How do you clean porous concrete slabs without damaging them?
Start by sweeping or vacuuming loose debris, then test your cleaner on a hidden area first. Use a pH-neutral or mild detergent solution with a stiff-bristle brush, scrubbing gently to avoid grinding contaminants deeper into the porous structure. Rinse thoroughly with clean water and allow the slab to dry completely.
Can you pressure wash porous concrete?
Pressure washing porous concrete requires caution. While high-pressure methods can be effective on some surfaces, porous slabs risk having contaminants and cleaner residue driven deeper into the material. If you use a pressure washer, keep pressure low (under 1500 PSI), maintain distance from the surface, and follow immediately with vacuuming to remove excess moisture. For textured or stamped concrete, consider alternative methods like manual scrubbing with a nylon-bristle brush to avoid surface damage.
What is the best cleaner for concrete slabs?
pH-neutral cleaners or mild detergent solutions are safest for porous concrete slabs. Avoid acidic cleaners (pH below 4 or 5) and never apply acids under pressure, as they can etch and damage the surface. Warm water with a diluted floor cleaner works well for general cleaning. Always test your chosen cleaner on a small, inconspicuous area first to ensure it won’t discolor or damage the concrete before treating the entire slab.
How do you remove stains from porous concrete?
For oil and grease stains, apply an absorbent material like clumping cat litter to soak up fresh spills, then sweep and wash with a degreaser. For set-in stains, soak the area with your pH-neutral cleaner, allow dwell time for the solution to penetrate, then scrub with a stiff-bristle brush. Rinse thoroughly to prevent residue from being reabsorbed into the porous material. For stubborn stains, repeat the soak-and-scrub process rather than using high pressure, which can drive stains deeper.
Cleaning porous concrete doesn’t have to be complicated. Follow these steps, use the right cleaner, and manage moisture carefully. Your concrete slab will stay clean, protected, and looking its best for years to come.

No responses yet